You can imagine CapRover as a self-hosted open-source alternative to Heroku. You host it somewhere on a server, direct your domains to the server’s IP, and it will automatically generate SSL-Certificates for your deployed applications after you assigned a domain to them.
In this tutorial, we will use the 1-Click-Droplet with CapRover already set up.
Create the droplet — and after you got your public IP from the Droplet settings. Head to your DNS Settings where your domain is located. In my case, Namecheap.com, and create an “A Record” with Host: *.subdomain and Value: [DropletPublicIP].
I used “captain” as my subdomain, this is how it looks like in the DNS settings.
 required DNS entry for CapRover
Let’s say your domain is “example.com”. With this DNS entry, CapRover will be able to host any of your applications you create under [APP_NAME].captain.example.com. We also want to host our main website under example.com. Therefore, we add another DNS entry.
 add your main domain to be usable my CapRover
This time the Host is “@”
After you saved your new DNS settings, it will take up to 24 hours to come into effect. Now you can visit http://[IP_OF_YOUR_SERVER]:3000 in your browser and login to CapRover using the default password captain42 . You should change your password. Follow the instructions to add your captain subdomain.
Self-Hosted Github-Pages
Now we need to update your website’s repository — we need the repository to be hosted son something like Github or Gitlab — it can be a private repository.
Create a new file in your repo, and name it “captain-definition”, paste the following code into that file, but do not push the new file yet.
The captain-definition tells CapRover how to deploy your project. In this case, we are telling CapRover to create a web server (nginx) and move all of your website code into the HTML folder.
Go to your Caprover Web Interface and create a new app.
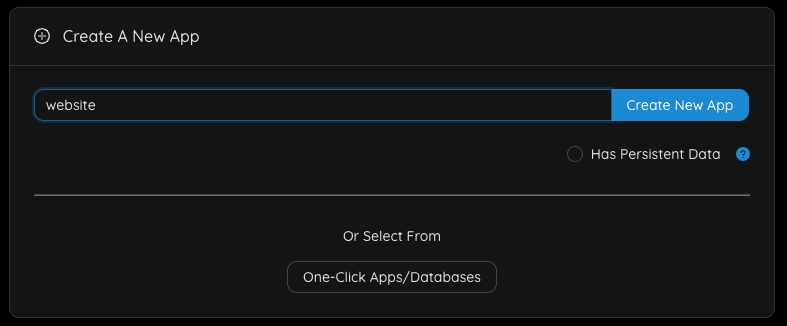 create a new app
Under HTTP Settings, connect your main domain — in this case, it is example.com. Set Container HTTP Port to 80.
In the Deployment Tab we will scroll down to “Method 3: Deploy from Github/Bitbucket/Gitlab” fill in your information accordingly — I recommend you to use an SSH-Key instead of username/password — Create a new SSH key pair specifically for this repo — do not use your main one.
Now click “Force Build” — your build will result in nothing. Because we did not yet push the captain-definition.
But a Webhook URL was generated by CapRover copy the URL and add it to your repos settings in Gitlab/Github/Bitbucket. Make every push trigger the webhook.
Finally, commit your captain-definition and git push. Every-time you push new code to the specified branch — a deployment is triggered on CapRover.
That’s it — you have successfully built your own self-hosted Github-Pages.